FlexUnit 4を実行する
FlexUnit 4の雰囲気を感じるために、単独のテストケースを実行する簡単なプログラムを書いてみます。
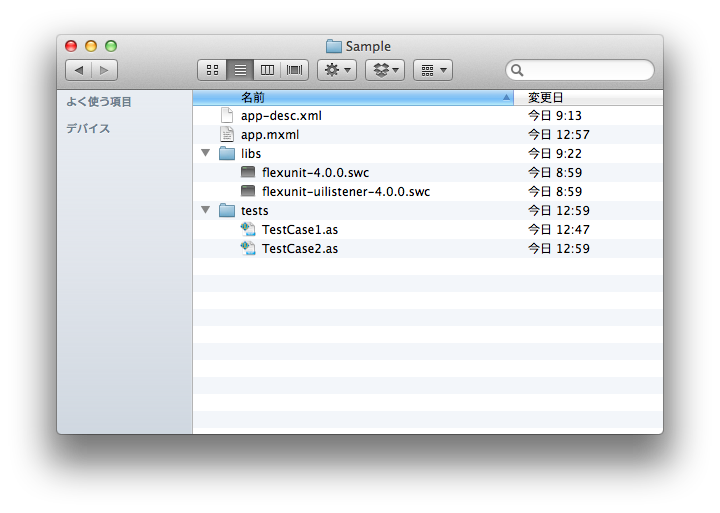
ファイル構成は次の通り。tests内にテストケースを配置します。

主なリファレンスは次の通り。
テストケース
まずテストを記述したテストケース用のクラスを書きます。FlexUnit 4ではメタデータをつけたメソッドがテストとして認識されます。assertはAssertクラスのスタティックメソッドを使用します。
// TestCase.as
package tests {
  import org.flexunit.Assert;

  public class TestCase1 {
    [Test]
    public function testMethod():void {
      Assert.assertEquals(1, 0);
    }
  }
}
setUp/tearDownに相当する処理はBefore/Afterメタデータで指定します。Before/Afterは複数指定したり、処理順を制御できたりもできます。
// TestCase2.as
package tests {
  import org.flexunit.Assert;

  public class TestCase2 {

    private var array:Array;

    [Before]
    public function before():void {
      array = new Array();
    }

    [After]
    public function after():void {
      array = null;
    }

    [Test]
    public function test():void {
      Assert.assertEquals(array.length, 0);
    }
  }
}
テストランナー
テストを実行するコードをapp.mxmlに書きます。FlexUnitをダウンロードしたときに同梱されている「FlexUnit4Turnkey.mxml」を参考にします。
mxmlに配置したTestRunnerBaseにidをつけて、UIListenerを生成しFlexUnitCoreのインスタンスに渡します。runメソッドに直接テストケースのクラスを渡すことで、テストが実行されます。
<?xml version="1.0" encoding="utf-8"?>
<mx:WindowedApplication
  xmlns:mx="http://www.adobe.com/2006/mxml"
  xmlns:flexUnitUIRunner="http://www.adobe.com/2009/flexUnitUIRunner"
  width="1200"  height="580"
  creationComplete="creationCompleteHandler(event)">

  <mx:Script>
    <![CDATA[
      import mx.events.FlexEvent;

      import org.flexunit.listeners.UIListener;
      import org.flexunit.runner.FlexUnitCore;

      import tests.TestCase1;
      import tests.TestCase2;


      private var core:FlexUnitCore;

      private function creationCompleteHandler(event:FlexEvent):void {
        core = new FlexUnitCore;

        core.addListener(new UIListener(uiListener));

        core.run(TestCase1, TestCase2);
      }
    ]]>
  </mx:Script>

  <flexUnitUIRunner:TestRunnerBase
    id="uiListener"
    width="100%" height="100%" />
</mx:WindowedApplication>
コンパイルして実行します。
$ amxmlc -library-path+=libs app.mxml
$ adl app-desc.xml
テストが実行され、結果が表示されます。
